HOW I PIZZA
Welcome to my approach to pizza making. This isn’t a strict recipe or a step‑by-step guide. It’s a workflow that shows how I make pizza, shaped by years of practice, trial, and error. I don’t have any formal culinary training, no restaurant background, and I’m far from NYC, but I wanted to recreate that classic New York taste at home. I spent hours on sites like r/pizza, pizzamaking.com, and many others, trying out every technique I came across. Through it all, I’ve picked up some experience, a lot of knowledge, and a deep respect for those who make pizza for a living.
As my experience grows, my process keeps changing. Expect yours to evolve too as you dial in your own approach.
Technique is the real foundation, not the recipe.
Equipment I Use
- Kitchen scale (0.1g precision)
- Kitchen scale (0.001g precision)
- IR thermometer
- Baking “steel” 18 inches x 18 inches x 3/4 inch 6061 aluminum plate, machined and hard anodized (comparable in performance to 1/2 inch thick steel)
- Food mill (medium plate)
- 96 oz dough tins
- 20" Wooden pizza peel
- Electric range oven with upper broiler element
Note: You don’t need all of this to get started. This is simply the gear I use in my own workflow, built up over time as I refined my process. The one thing that is essential is a good kitchen scale because accuracy and consistency depend on weighing every ingredient. Start with the basics, learn the technique, and add equipment only when it actually helps your results.
Baking Steel Suggestions:
If you're serious about pizza making, I highly recommend baking on steel. Don't waste your money on commercial baking stones or pans. With baking steels, you generally have two options. There are several commercial brands available, but they are generally thin (usually ¼") and only 14 or 16 inches, so you're stuck making smaller pies. For a true NY style baking experience, I recommend going custom. Call your local steel supplier and source an A36 steel plate as thick as your oven can handle, and as large as possible. If you can fit an 18" square by 3/8" or 1/2" thick, that will be a pizza baking beast, but it'll be heavy.
You'll need to choose a size that your oven rack can handle, but generally with steel, 3/8" is the minimum thickness I would personally use. With baking steels, the thicker it is, the more heat it will hold, the easier it will be to control your bake.
A36 steel notes:
- It's mild carbon steel, same as most commercial baking steels and restaurant griddles food safe when prepped.
- Prep: Remove mill scale/rust (vinegar soak 24–48 hrs + scrub, or sand), season with high-smoke oil (flaxseed/canola/etc.), bake 450–500°F for 1 hr, repeat 2–3x.
Thickness picks:
- ¼": Heats fast, lighter, but drops temp quicker. Only making one pizza before having to reheat for 20-30 min.
- 3/8": Sweet spot great heat hold, consistent bakes, faster recovery time.
- ½": Beast mode thermal mass, but heavy AF, longer preheat, can bake multiple pizzas back to back with minimal reheat time.
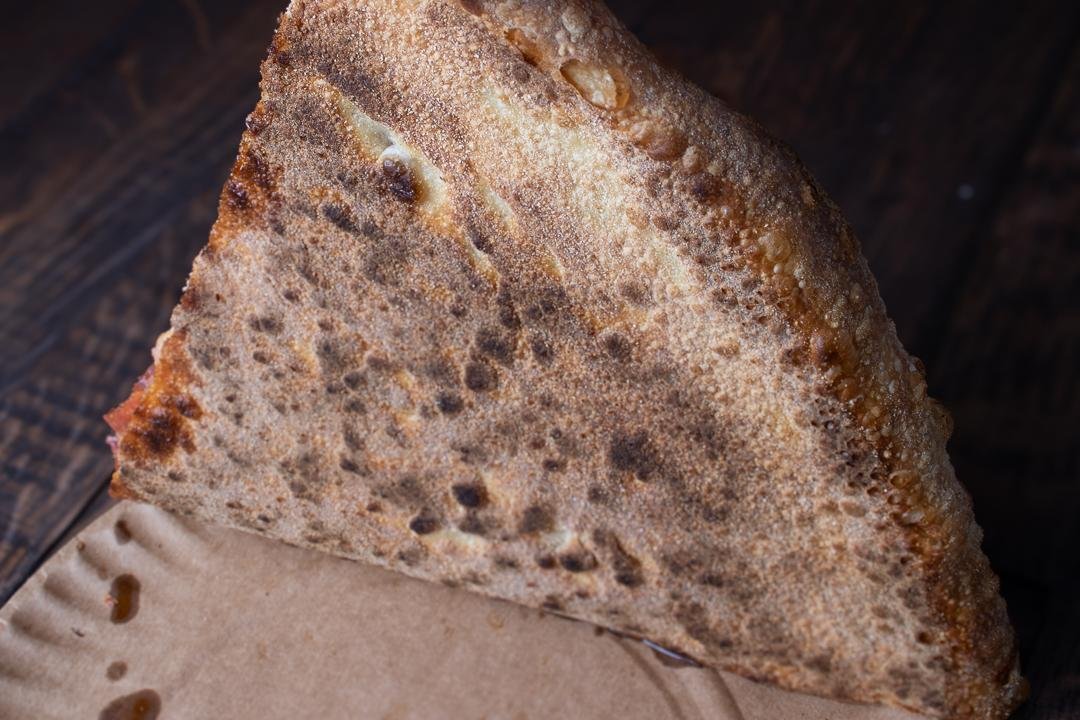
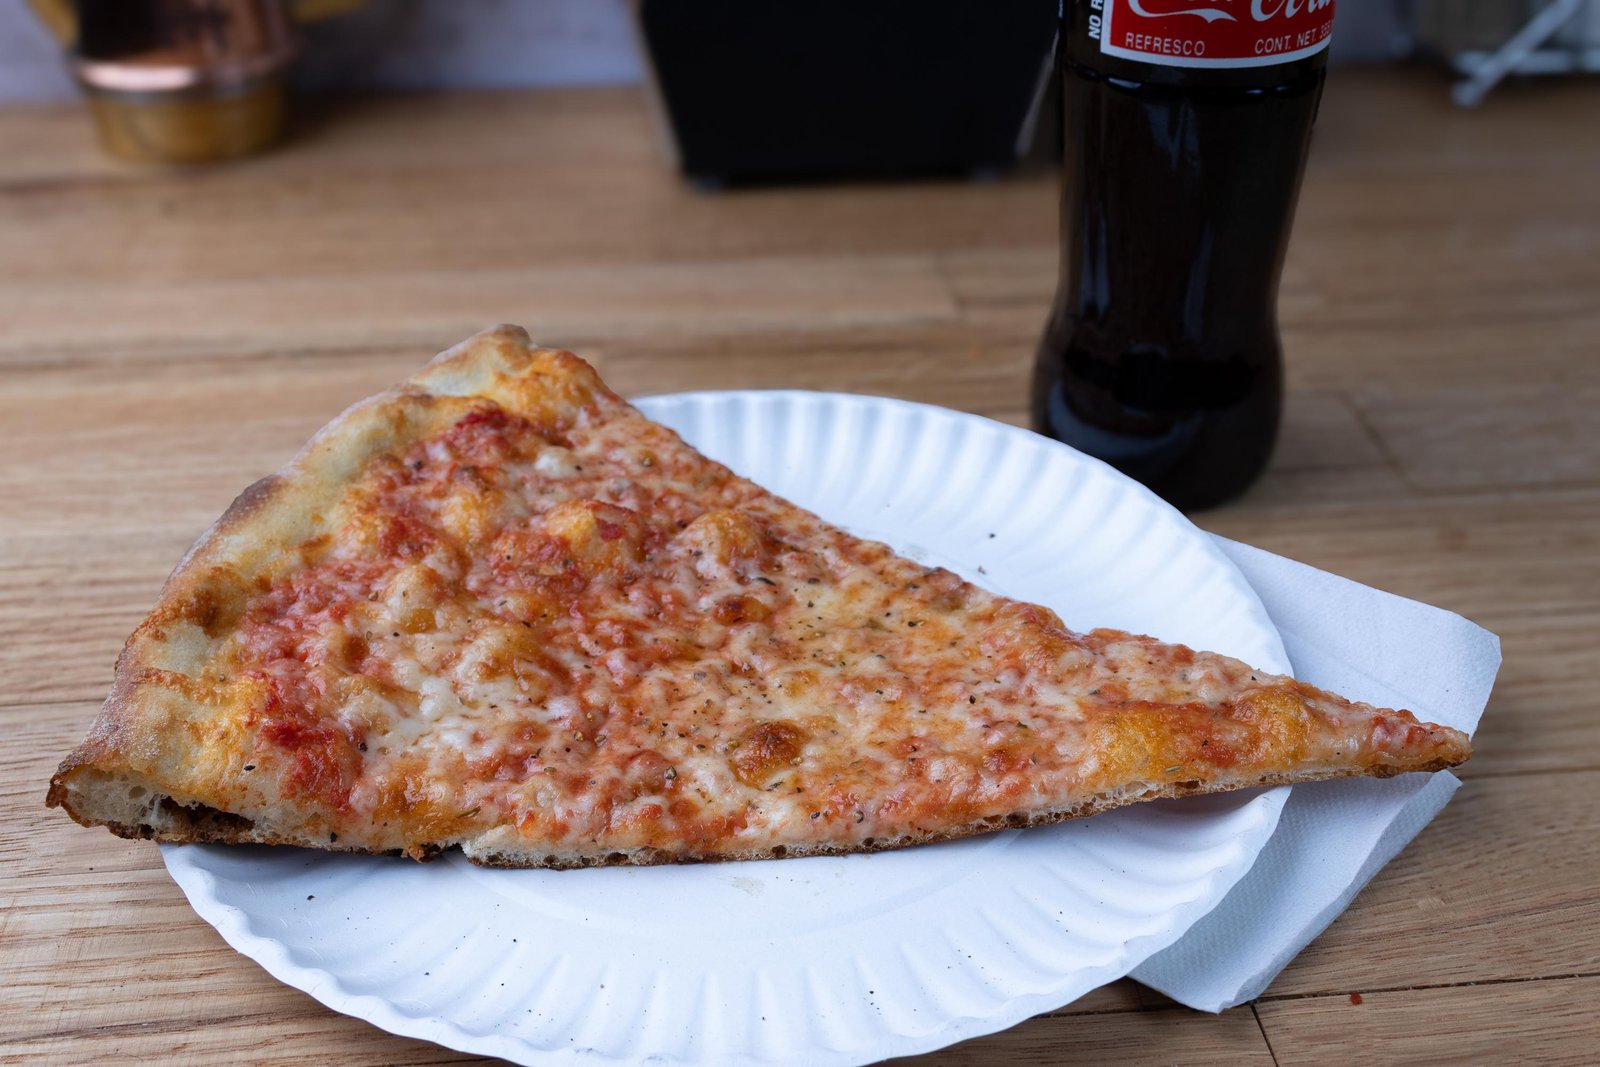
The crust we aim for – crisp, airy, lots of blistering
Ingredients
High-quality ingredients matter when you want great pizza. Never cut corners on cheese or tomatoes because they decide most of the final flavor. The dry ingredients still play an important role, but they don’t influence the outcome as much as the quality of your tomatoes and cheese. Below are the ingredients I use, chosen for their long history in real top tier New York City pizzerias.
- Flour: General Mills' All Trumps: This is a high-gluten, spring wheat flour with a protein content of approximately 14.2%. (This is the flour used by Joe’s Pizza in NYC as well as many others.
- Yeast: Saf-instant IDY (pizzerias typically use fresh yeast, which is not very practical in home baking)
- Salt: Sicilian Sea Salt or Morton Sea Salt if unavailable
- Oil: Extra Virgin Olive Oil
- Sugar
- Bench Flour: Coarse Semolina (for flouring your work surface and pizza peel)
- Cheeses: Grande Whole Milk Mozzarella, Grande Part-Skim Mozzarella
Locatelli Pecorino Romano, Parmigiano Reggiano
- Tomatoes: Stanislaus (Alta Cucina, 7/11s, Tomato Magic, etc)
- Seasonings: Homemade Pizza Seasoning with dried oregano, fresh basil leaves, black pepper, red pepper flakes, salt. Whatever you like here is fine.
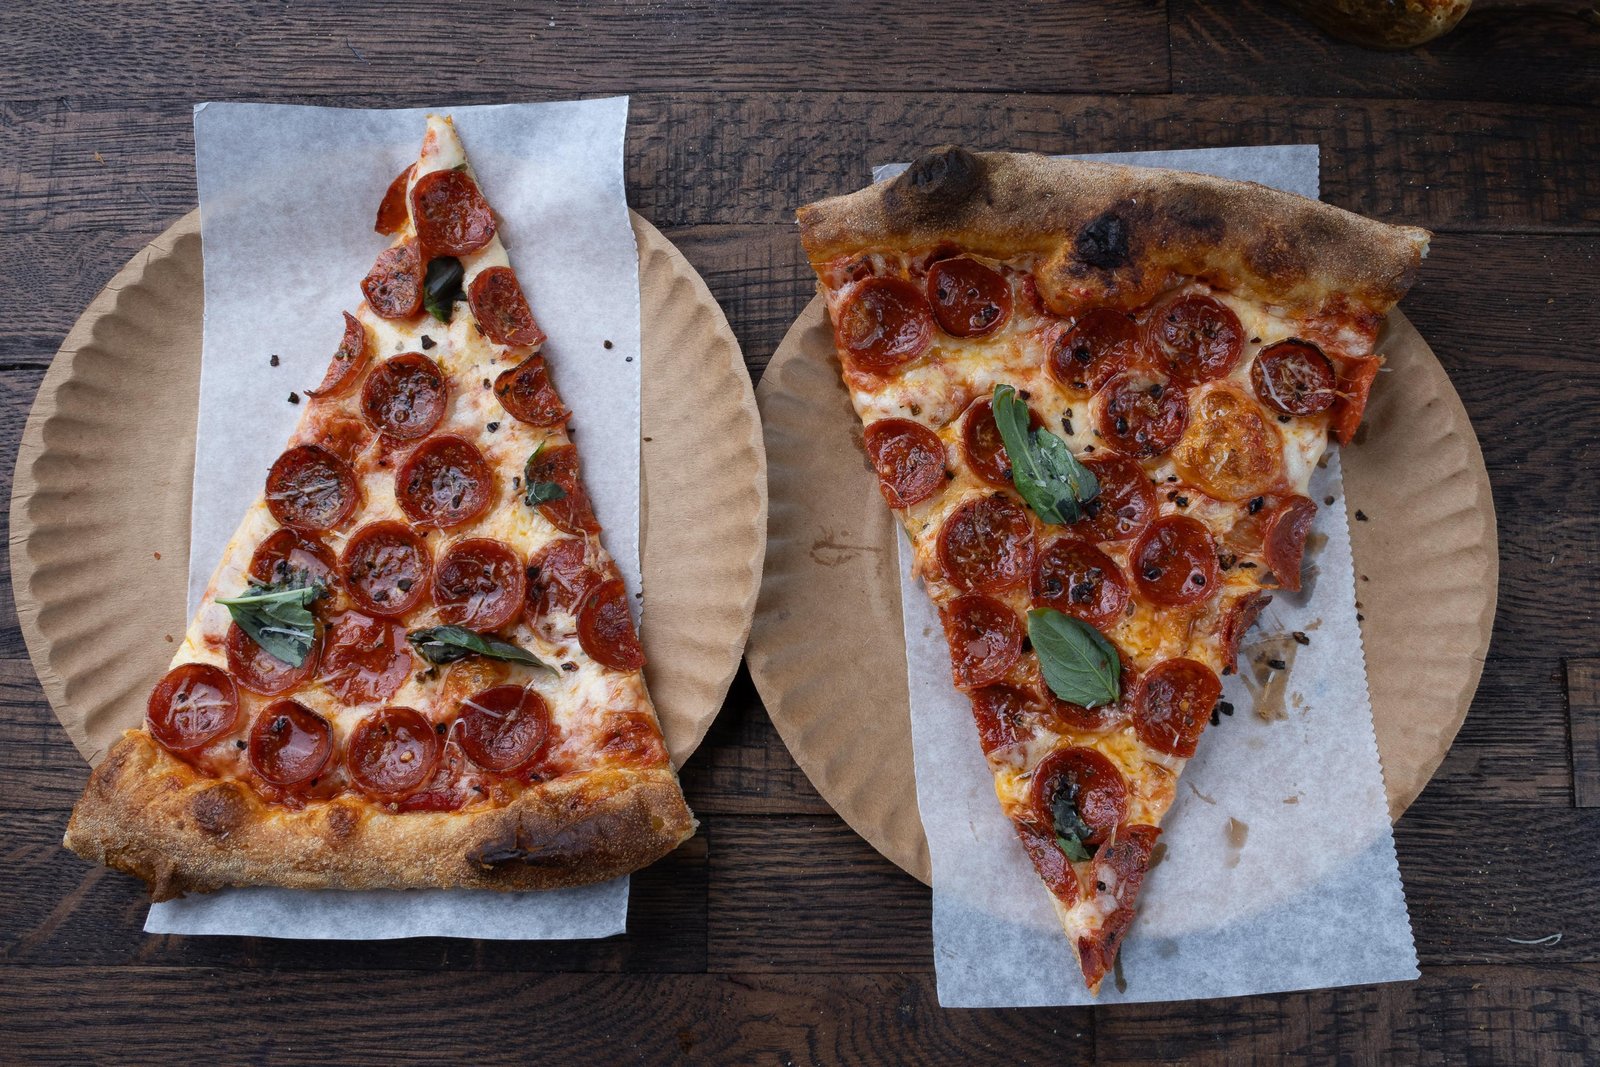
High-quality ingredients in action – monster pepperoni pie
Baker’s Math
Pizza dough recipes often use baker’s math (baker’s percentages) to express ingredient proportions relative to the flour’s weight, which is invaluable for accuracy, consistency, and scalability. For more on Baker’s Math, Pizza Today’s article on baker's percentages is a helpful resource.
Thickness factor, sometimes called dough loading factor, is how you control the thickness of your pizza. It is expressed in grams of dough per square inch. A typical New York style pizza uses a thickness factor between 0.075 and 0.1. I personally prefer 0.083 to 0.085.
Dough Calculator
The Pizza Dough Calculator is a go-to tool for customizing dough recipes based on pizza size and thickness. By inputting values like diameter and thickness factor, the calculator provides precise measurements for each ingredient, helping to achieve consistent results every time. There are many calculators available both online and inapp stores. Pick one you like, such as this one.
Dough Preparation
The dough is the starting point, mixed and prepared first before anything else. Once made, the dough will proof the refrigerator for 24-72 hours. During this time, frozen tomatoes can be transferred from the freezer to the fridge to thaw for sauce-making later.
Dough Recipe
Yield One 18-inch pizza Total Dough Ball Weight 21 Ounces ( 599 grams)
- Flour 350.0 grams (100%)
- Water 217.0 grams (62%)
- EVOO 17.5 grams (5%)
- Salt 10.5 grams (3%)
- Yeast 1.1 grams (0.3%)
- Sugar 3.5 grams (1%)
Dough Mixing and Handling
- Start by adding my salt and sugar to my mixer bowl, then the water, stirring to dissolve. (this is the way Joe’s Pizza in NYC makes their dough)
- Add the flour, then IDY on top of the flour, mixing until incorporated. (there is no need to "proof" your IDY)
- Mix on medium-low for 8 minutes, resetting the dough ball if it begins to climb out of the bowl.
- After 8 minutes, remove the dough from the bowl and give it a few hand kneads to make sure it’s mixed well, then place the dough back into the bowl, cover, and let it rest for 30 minutes. It will still be somewhat shaggy at this point. During the 30 min rest you will perform a series of stretch and folds.
- At the 10-minute mark, perform a couple of stretch and folds, then repeat at the 20-minute mark.
- After 30 minutes, shape the dough into a ball, place it in an oiled container, and seal. Let rise at room temperature for 1 to 2 hours, then refrigerate for 24 to 72 hours.
Note I'm waiting for the dough to "move" before placing it into the fridge. The time it takes for the dough to start rising varies with the environment. In a kitchen at 69 to 71°F, it usually takes between 1.5 to 2 hours before it’s ready. You want to catch it just as it begins to move, you aren't looking for it to double or anything close. This is where your experience will come into play. You’ll get a feel for it by just making pizzas.
Dough technique result – perfect NY crust
Sauce Preparation
My current sauce is one #10 can of Stanislaus 7/11 tomatoes, combined with 1 can of Stanislaus Alta Cucina whole tomatoes. I run both through a food mill with medium plate to remove most of the skin and seeds first. The tomatoes are then mixed and portioned into 8-10-ounce servings and frozen for convenience.
Note: Stanislaus is one of the go-to brands for New York City pizzerias. Many top spots use Stanislaus tomatoes like 7/11 Ground Tomatoes, Full Red, or Alta Cucina for that classic fresh bright flavor in sauce.They are wholesale only but you can find them at U.S. Foods Chef'Store locations which are open to the public. Restaurant Depot also carries them though they might require a free business membership or day pass.
When I don't feel like driving to get Stanislaus I sometimes use Cento San Marzano tomatoes instead. Cento are sold at most grocery stores and have a good sweet rich flavor that's solid for homemade pizza sauce. Not exactly the same pro-NY profile but a reliable everyday option that works well.
Sauce Recipe
Remove one 8 ounce portion of tomato sauce from freezer two days before baking pizza. Place into refrigerator to thaw overnight.
- After thawing the frozen sauce, I transfer it to a small bowl and adjust with water until it reaches the preferred consistency (usually ~1 oz per 8 ounces of tomatoes). Then weigh and season as follows:
- Tomato Sauce 100%
- Salt 0.38% (adjust to taste)
- Sugar 1.5% (adjust to taste)
- Garlic 1 clove, crushed
- Oregano (or Pizza Seasoning) 0.25%
- Carolina Reaper Powder 0.02% (optional)
- Add dry ingredients, stir and refrigerate the sauce overnight. Take sauce out of the fridge the at least an hour and a half before you make pizza. You want room temp sauce, not cold sauce on your pizza.
Sauce done right – bright and balanced
Pizza Day
A few hours before baking, remove the dough and sauce from the refrigerator and allow to slowly warm up at room temp. (usually 2 to 4 hours).
- Preheat Oven: Place the steel one slot above center and preheat the oven to max temperature for 1 to 1.5 hours. Tracking the steel temperature with an IR thermometer helps ensure it’s fully heated. My oven is 500° F max.
Assembly and Baking
- Stretch the Dough Stretch the dough to an 18-inch diameter being sure to “edge stretch” for even thickness. Place stretched skin onto floured peel.
- Spread the Sauce Add an 8 oz ladle of sauce to the center of the dough, followed by a handful of freshly grated Parmigiano Reggiano. Using the back of the ladle, press down into the sauce, raise slightly and spread the sauce in a circular pattern to within 1/2 inch of the edge. Toss a dash of black pepper over the sauce.
- Cheese and Toppings Sprinkle 10 oz of cold, shredded mozzarella from the rim toward the center of the pizza, spread evenly, then add toppings. While adding the toppings (or cheese if no toppings), place the oven in broil mode. This ensures the broiler is glowing hot when you launch your pizza onto the steel.
Note: For NY style cheese coverage, I like to use the 1
- Broil and Bake Shake the peel before going into the oven to ensure the pizza isn’t stuck to the peel, then launch it onto the hot steel quickly and close the oven door. Broil for 1.5 to 2 minutes, then switch the oven to bake cycle to finish the bake. Rotate at 3 to 5 minutes and pull when baked to your liking. For me, 5 to 7 minutes is usually perfect.
Once out of the oven, let the pizza rest on a cooling rack for 2 minutes to let steam off. While cooling, add a handful of Locatelli Pecorino Romano and fresh basil if desired. After 2 minutes, transfer to a pan, slice, and serve.
For a slice-shop style crisp, let slices cool on the pan for a few minutes, then briefly return each slice to the hot steel to get an extra-crispy bottom before serving.

Assembled, baked, and sliced – ready to cool
Baking Tips
- Reducing or extending the broiler time and adjusting the oven temperature are effective ways to modify the baking process for your pizza. You can also raise or lower the steel positioning in the oven to achieve the desired results. The aim is to determine how long it takes to achieve your desired crust on the bottom. For future pizzas, make adjustments to ensure the top finishes baking in the same amount of time. Similar to dough handling and proofing, mastering this technique requires practice and familiarity with your specific oven.
Perfect char – adjust steel position and broiler time
Final Notes:
Cheese selection/Coverage
Grande Cheese remains a top-tier choice for authentic New York-style pizza, its low-moisture, aged mozzarella (especially the East Coast Blend of whole milk and part-skim) delivers that signature buttery flavor, perfect stretch, golden browning, and minimal oil-off in high-heat ovens. It's the gold standard for many classic NY pizzerias because of its reliability and performance. That said, Grande can be hard to source for home cooks (it's primarily foodservice-oriented and not always in retail stores). If you can't find it, here are some strong alternatives that many pizza enthusiasts and pros recommend for similar results on NY-style pies:
- Boar's Head Whole Milk Low-Moisture Mozzarella - As you mentioned using this one (and yes, it's pricier), it's an excellent premium option. Sliced or chunked from the deli counter, it offers a rich, creamy flavor with great melt and stretch, minimal greasiness, and a luxurious texture that holds up well on pizza. Many home pizza makers praise it as a close stand-in for Grande, especially when grated fresh.
- Galbani Low-Moisture Whole Milk Mozzarella (look for the "firmer texture" loaf variety) - Widely available in grocery stores, this is one of the most recommended retail alternatives. It provides solid tang, excellent melt, good browning, and that classic stringy pull without sogginess - often winning blind taste tests for home NY-style pizza.
- Polly-O Low-Moisture Mozzarella - A frequent top performer in taste tests (including Serious Eats rankings), it's reliable for stretch, flavor, and clean melt. It's a go-to for many when Grande isn't an option.
- Other solid contenders - Trader Joe's whole milk low-moisture block (surprisingly great value and performance), Capiello, or even Saputo brands if accessible. For a DIY "NY Blend," mix equal parts whole milk and part-skim low-moisture mozz from any of these to mimic Grande's East Coast Blend.
The key is sticking to quality low-moisture, aged mozzarella (whole milk for richer flavor, or blended for balance) -grate it yourself for best results, and avoid pre-shredded bags with anti-caking agents if possible.
Coverage:
NY-style pizza uses a moderate cheese amount for that classic look - enough for good melt and stretch without drowning the sauce or making it greasy. Many home bakers and pros aim for about 1 gram of cheese per square inch of pizza surface. It's a solid starting point for authentic coverage: you see some sauce peeking through, slices fold nicely, and it balances the thin crust.
How to calculate total cheese grams:
- Measure your pizza diameter in inches (for round pies).
- Find the radius: divide diameter by 2.
- Area = radius × radius × 3.14 (that's π, rounded for easy math).
- Total cheese (grams) = area × 1.
Examples (using exact π for accuracy):
- 12-inch pizza: radius 6", area ≈ 113 square inches → 113 grams cheese.
- 14-inch pizza: radius 7", area ≈ 154 square inches → 154 grams cheese.
- 16-inch pizza: radius 8", area ≈ 201 square inches → 201 grams cheese.
- 18-inch pizza: radius 9", area ≈ 254 square inches → 254 grams cheese.
(Quick tip: 1 gram per square inch often lands around 5–9 oz for typical sizes, matching what many NY-style recipes suggest for light-to-moderate cheese.)Grate your low-moisture mozzarella fresh, spread evenly (cheese on top of sauce for NY style), and tweak up/down by 10–20% based on taste - lighter for more sauce visibility, heavier if you like extra gooey. Start at 1 g/in² and adjust from there.

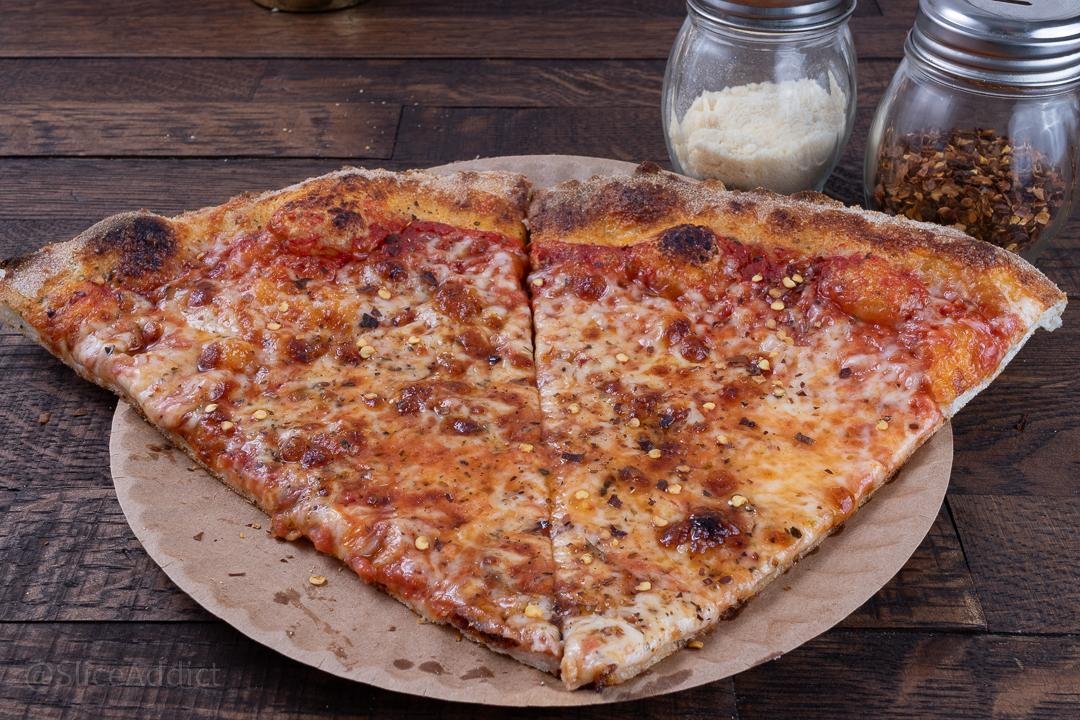
1 g/in² cheese – sauce peeks, good stretch

Loaded toppings – sausage, pepperoni, basil

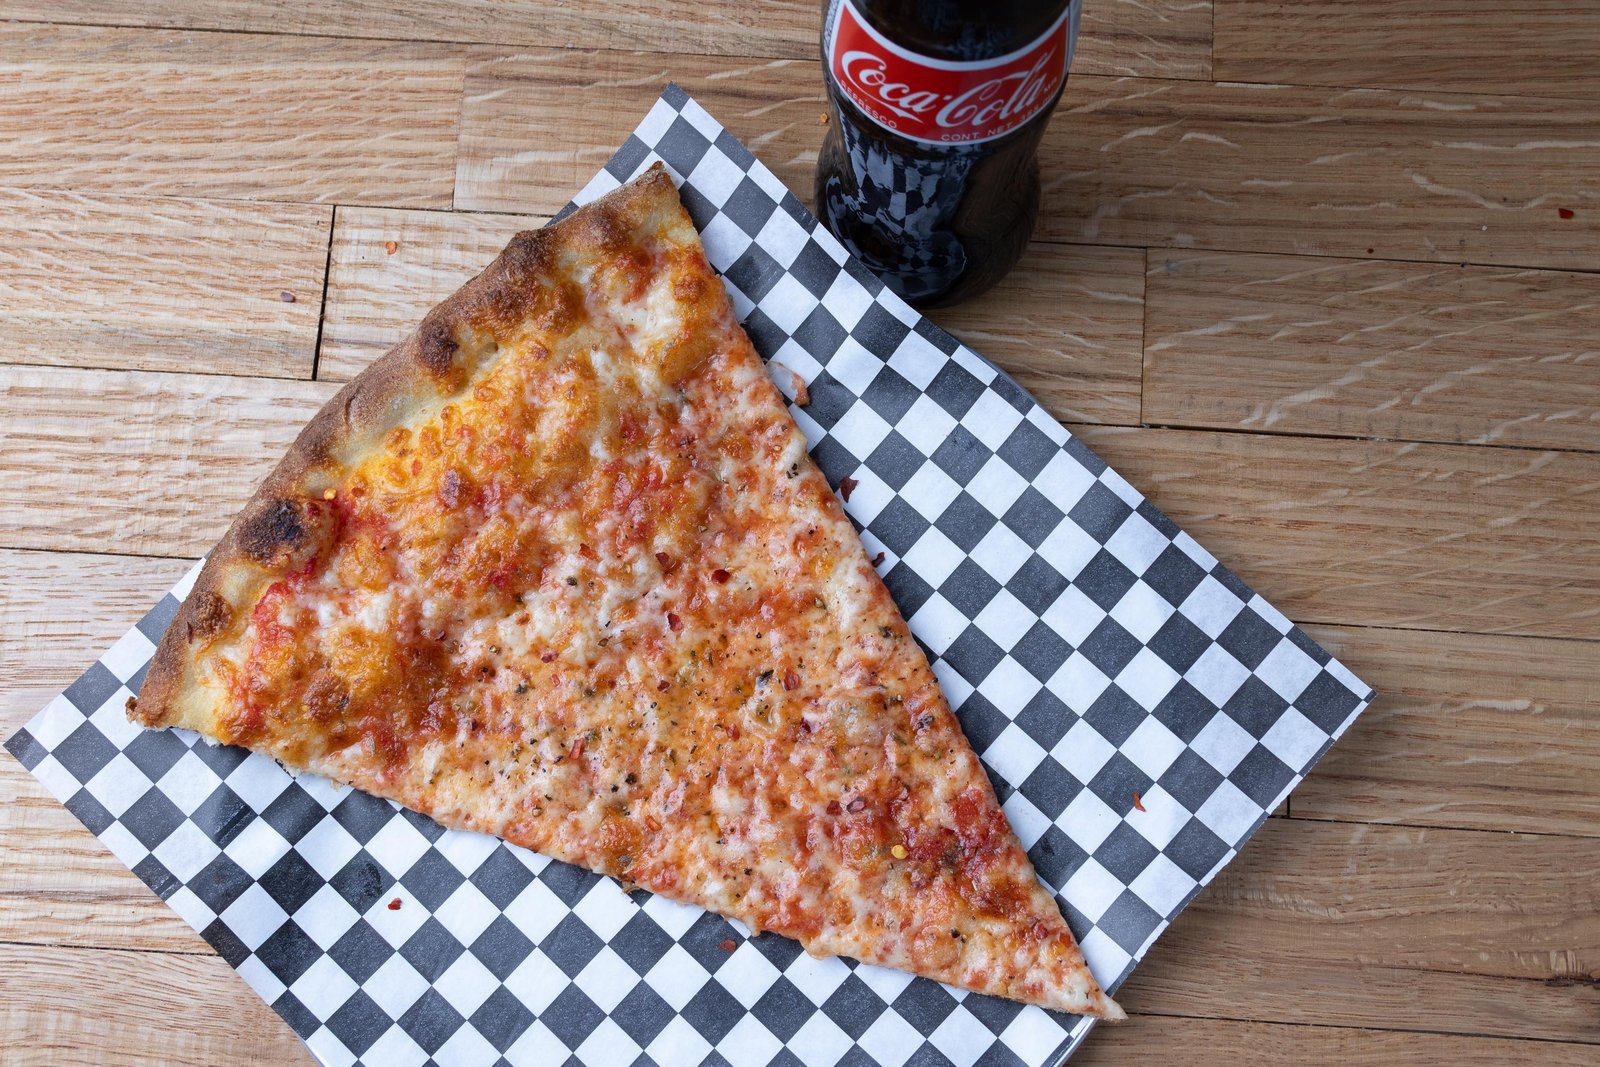
Ready to serve – foldable and crispy
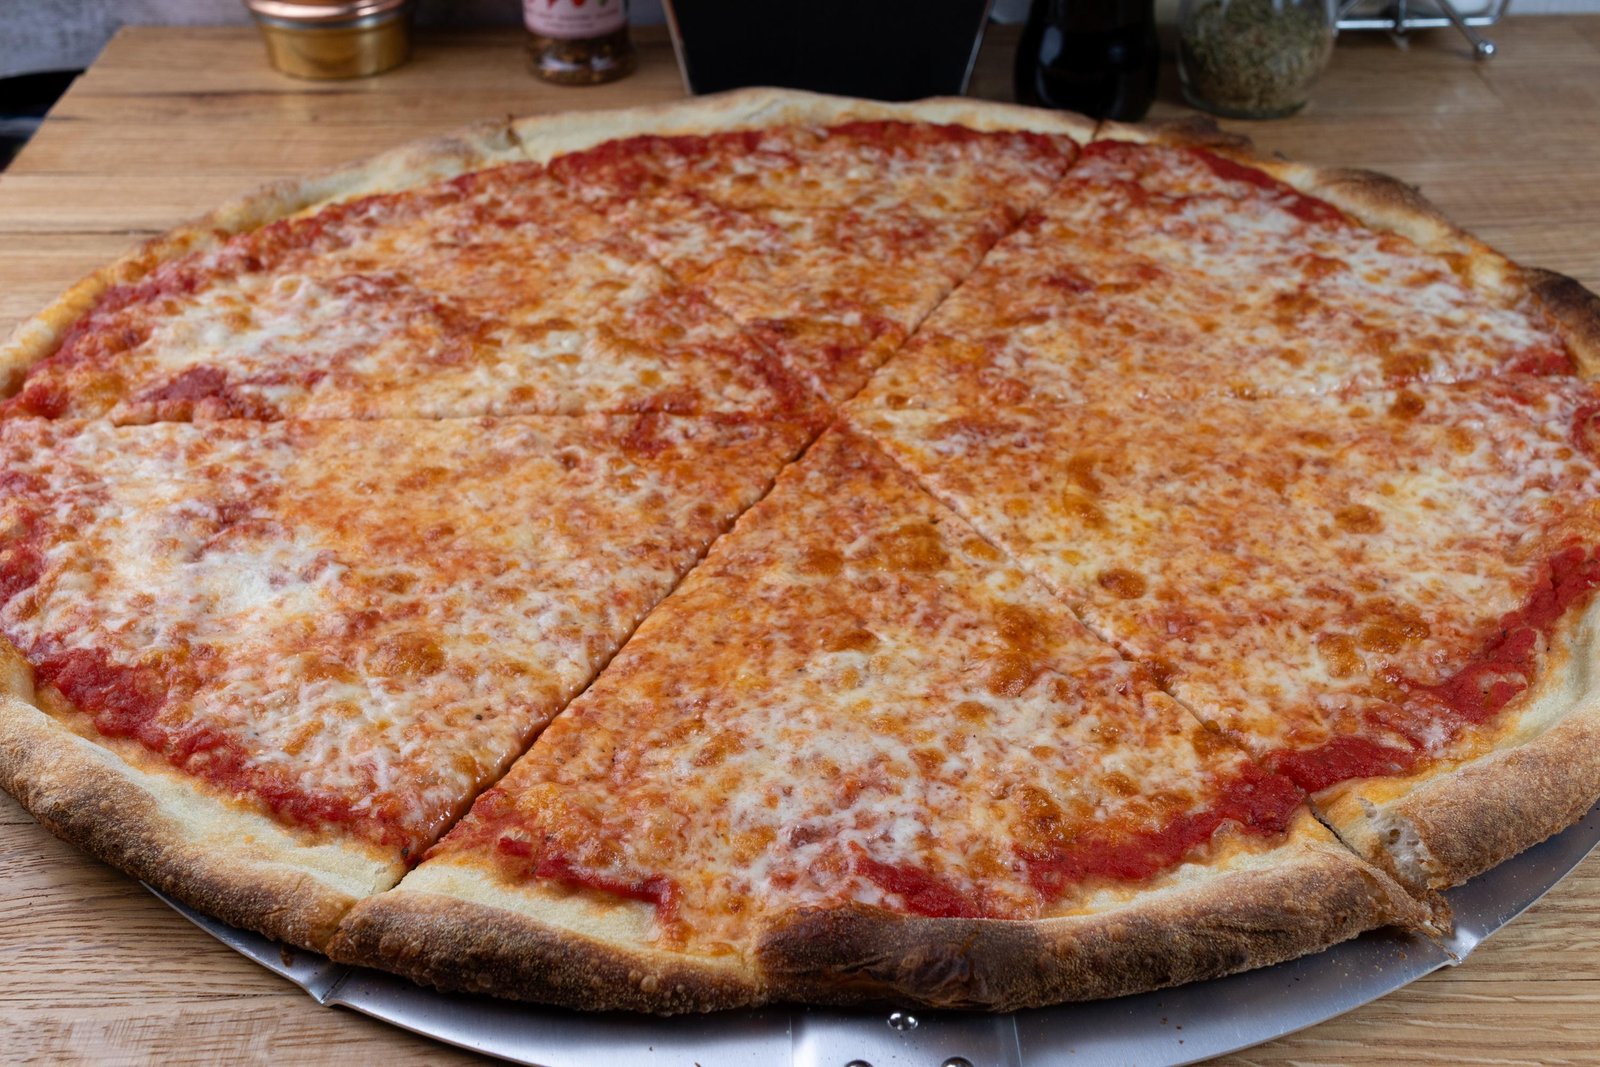
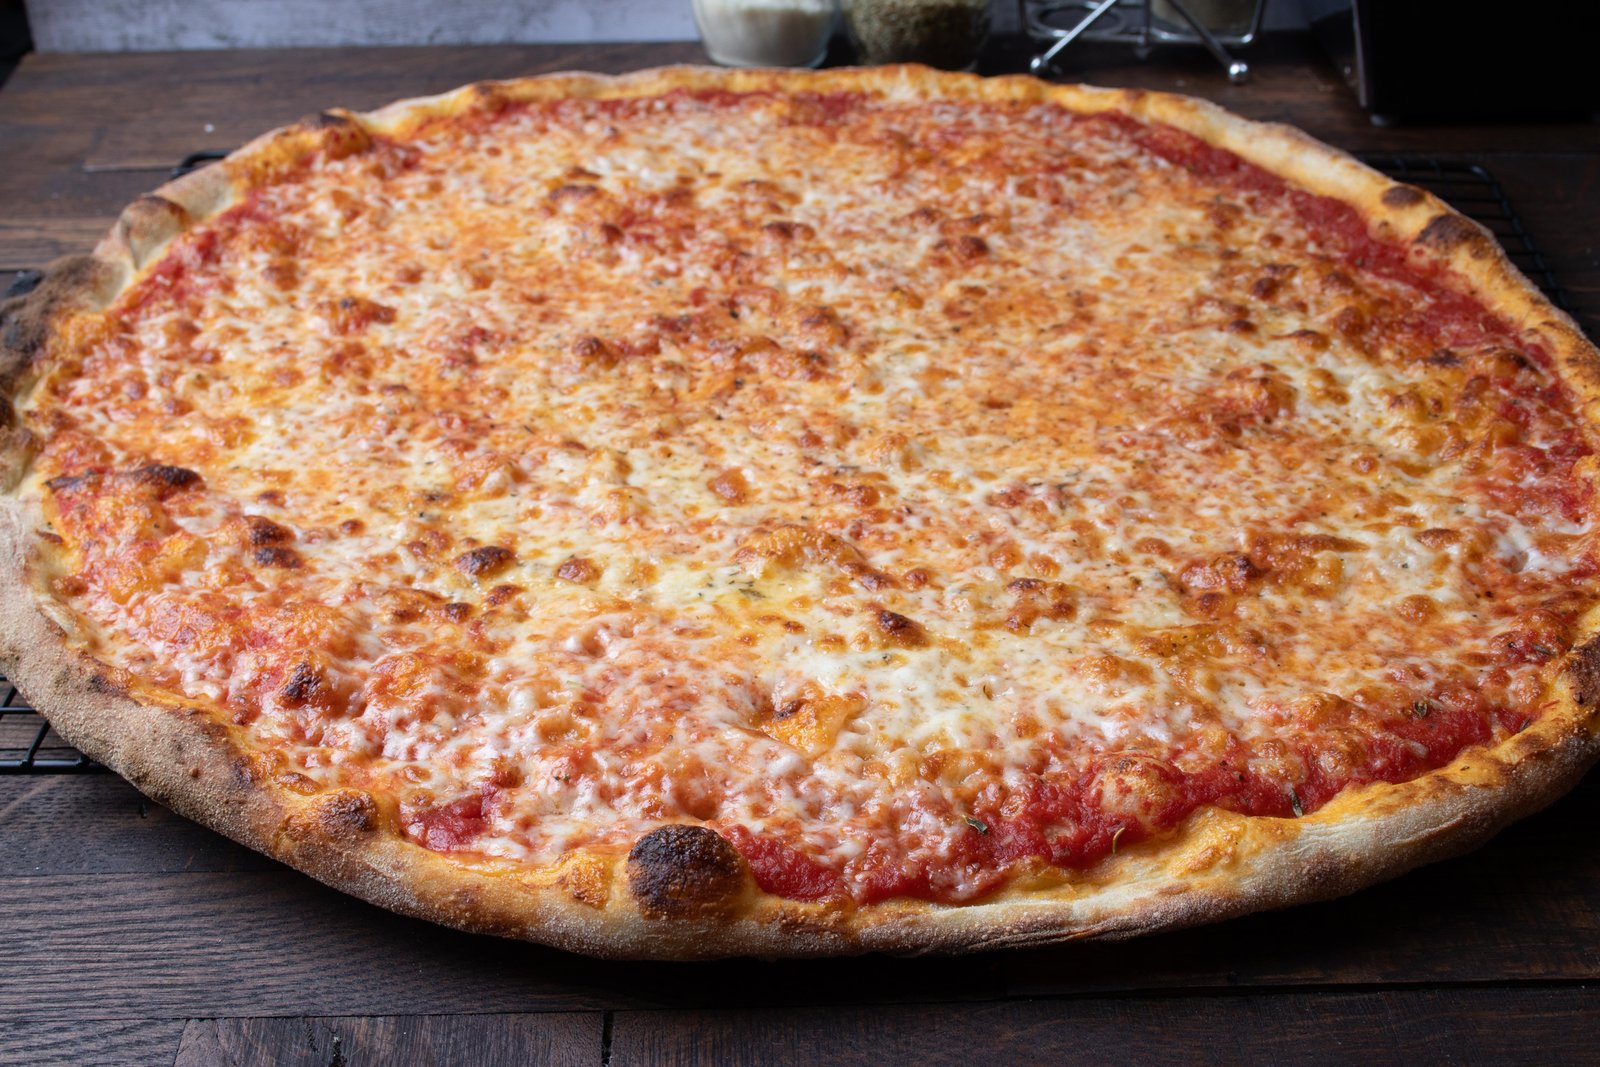
The complete pie – cheese, sauce, char
Pepperoni curl and cheese pull

Fresh basil added post-bake

Monster pepperoni – ready to slice
Nothing plain – full flavor

Don't do this – keep the broiler in check